
TL;DR
- Most automation projects fail at the planning stage, not the build stage – the workflow you choose and how well you document it before touching any tool determines whether the result is reliable or fragile.
- The right first workflow is one that’s already consistent, triggered by a clear event, and runs often enough that the time savings are obvious within weeks.
- Testing means deliberately breaking the automation – missing fields, duplicate records, edge-case inputs – not just confirming it works when everything goes right.
- Every automation needs an owner, a documented fallback, and a way to detect failures before your customers do.
Table of Contents
Here’s what most implementation guides skip: the teams that struggle with workflow automation implementation aren’t struggling because they picked the wrong tool. They’re struggling because they automated a process they hadn’t properly understood – and the automation faithfully reproduced every inconsistency in it. Garbage in, garbage out. But now it happens automatically and at scale.
The good news is that this is entirely avoidable. Implementing workflow automation doesn’t require a developer, a big budget, or months of planning. It requires discipline about the order of operations: understand the process first, then build the automation around it.
This guide is for small business owners and operations managers who want to automate business workflows without hiring a consultant or buying a platform they’ll never fully use. It takes you from choosing your first workflow all the way through monitoring it in production. No assumed technical knowledge. No tool evangelism. Just the workflow automation steps that actually work.
Is Your Business Ready to Automate?

You don’t need to be a “digital-first” company. You don’t need a developer on staff. What you need is one process that’s already consistent enough to write down as a checklist.
That’s the real test. If you can’t describe a process as a clear sequence of steps – with a defined starting point, defined inputs, and a defined output – you can’t automate it yet. The automation will just encode the confusion.
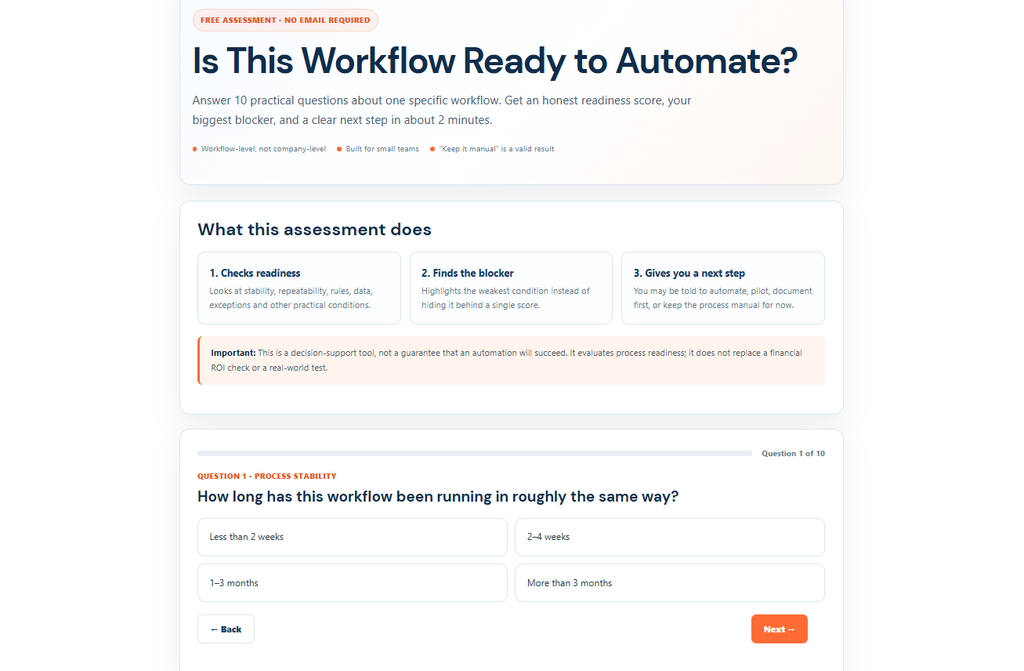
If you’re not sure where your business stands, a free automation readiness quiz is a useful starting point before you commit time to a build. It takes a few minutes and tells you which processes are genuinely ready and which ones need more work first.
When Should You Split or Simplify an Automation?
A useful rule of thumb: if an automation needs more than 6–8 steps, it’s probably trying to do two things at once.
The natural split point is usually where data moves from one domain to another. Lead capture ends when the CRM record is created. What happens next – the follow-up email, the sales task, the spreadsheet update – is a separate process that happens to share the same trigger. Treating it as one automation creates a fragile chain. Splitting it creates four independent, manageable pieces.
Here’s a concrete example. Imagine a single automation that tries to: (a) create a CRM record from a form submission, (b) send a welcome email, (c) create a task for the sales rep, and (d) update a Google Sheet. That’s not one automation. That’s four automations sharing a trigger. When you build them as one, a failure in step (c) can block step (d), and debugging means untangling all four at once. Split them, and each one can be tested, maintained, and disabled independently. If the Google Sheet update breaks, the welcome email still goes out.
When you’re mapping a workflow and it starts to feel unwieldy, ask: “Where does one job end and the next begin?” That’s your split point.
Step 1 – Choose the Right Workflow
This is the most important decision you’ll make. Get it wrong and you’ll spend days building something that saves you minutes – or worse, something that breaks in ways you don’t notice for weeks.
Four criteria for a good first automation:
- It follows the same steps every time
- It starts with a clear, specific trigger (not “when someone seems ready”)
- It doesn’t require judgment calls mid-process
- It runs frequently enough that the time savings are obvious within weeks
Score your candidates. Multiply frequency per week by time per instance. That gives you your weekly time cost – and your ROI ceiling. An automation that saves 2 minutes on a task that happens twice a week saves 4 minutes. One that saves 15 minutes on a task that happens 20 times a week saves 5 hours. Start where the numbers are bigger.
Think about blast radius. Before you build anything, ask: how bad is it if this automation misfires? An internal notification going to the wrong Slack channel is annoying. An invoice sent to the wrong client is a problem. A customer-facing email going out with broken data is a real mess. Start with low blast-radius workflows – internal notifications, data sync between apps, internal task creation – before you touch anything customer-facing.
Good first workflows for small businesses: new lead → CRM entry, invoice sent when a job is marked complete, appointment reminder 24 hours before, new customer → onboarding email sequence, support ticket → team notification.
Readiness Scorecard
Before committing to a workflow, run it through this five-question check. Answer Yes or No for each.
| Criterion | Yes / No |
|---|---|
| Can you describe every step without ambiguity? | |
| Does it start with a specific, observable trigger? | |
| Does it run at least weekly? | |
| Does it require no mid-process judgment calls? | |
| Is the blast radius low if it misfires? |
Verdict: 5/5 Yes = ready to automate. 3–4/5 = fix the gaps first. Under 3 = not ready yet.
If you’re unsure whether a specific process is a good candidate, the article on when you should not automate a workflow covers the cases where automation makes things worse, not better.
Step 2 – Document the Current Process
Don’t open any tool yet. This step happens on paper (or a doc).
Write every step. Not a summary – every step, including the ones that feel obvious. “Check if the client is already in the CRM” is a step. “Copy the email address from the form into the contact record” is a step. If someone on your team does it, write it down.
For each step, capture:
| Step | Who does it | Trigger / input | System used | Output | Variations / exceptions |
|---|---|---|---|---|---|
| Receive new lead form | Sales rep | Form submission email | Gmail | Lead info in inbox | Sometimes submitted twice |
| Check for duplicate in CRM | Sales rep | Lead info | HubSpot | Existing or new record | Duplicate ~10% of the time |
| Create contact record | Sales rep | Lead info | HubSpot | New contact | Different fields for B2B vs B2C |
| Send intro email | Sales rep | New contact created | Gmail | Email sent | Different template for referrals |
Do the process archaeology. Here’s a step most teams skip: shadow the person who actually does the task – not the person who thinks they know how it’s done. Sit with them for one complete cycle. In small businesses especially, the documented process and the actual process often diverge. The sales rep who “creates a CRM record” might actually be copying data into a spreadsheet first, then into the CRM, then sending a Slack message to the account manager. None of that is in the written process. But all of it needs to be in your automation. Build what actually happens, not the ideal version.
Note the variations. What changes depending on the customer type, the day of the week, or who’s on shift? Those variations are your exception cases – and they’re exactly what will break an automation that was only built for the happy path.
Time the process. Do one complete manual run and time it. That’s your baseline. You’ll need it later to measure whether the automation actually helped.
Look for unnecessary steps. Some things the team does because “we’ve always done it that way.” If a step doesn’t need to exist, eliminate it before automating. Automating a redundant step doesn’t make it less redundant – it just makes it faster.
Step 3 – Define the Trigger, Rules, and Actions
Before you build, write out the logic. This takes 20–30 minutes and saves hours of debugging.
Trigger: the single event that starts the automation. It must be specific and unambiguous. “When a client seems ready to buy” is not a trigger. “When a form is submitted on the contact page” is. “When a deal is moved to the ‘Proposal Sent’ stage in the CRM” is. If you can’t describe the trigger in one sentence with no ambiguity, keep refining it.
Rules and conditions: if the workflow branches – different actions for different inputs – write those branches as IF/THEN statements before you build them.
- IF the lead source is “Referral” → send Template B
- IF the lead source is anything else → send Template A
- IF the contact already exists in the CRM → update the record, don’t create a new one
Actions: list every action in sequence. For each one, name the app, the specific action type (create record, send email, post message), and the exact data fields involved.
Exception handling: for each action, ask “what happens if this fails?” App unavailable. Missing required field. Duplicate record. Unexpected input format. Decide now – before you build – whether the automation should skip and log, route to manual review, or stop and alert someone. Making this decision after the first failure is too late.
Exception Decision Matrix
Not every exception deserves the same response. Use this 2×2 to decide how to handle each one before you build.
| High Frequency | Low Frequency | |
|---|---|---|
| High Impact | Handle in the automation – this will happen often enough to matter | Route to manual review – too risky to ignore, but rare enough to handle by hand |
| Low Impact | Log and skip – not worth stopping the automation | Ignore – the cost of building for it exceeds the cost of the occasional miss |
Work through your exception list and assign each one a quadrant. This keeps your automation focused on what actually matters and prevents you from building a 20-step monster trying to handle every edge case.
Step 4 – Choose Your Automation Approach
Three honest options:
1. No-code integration platforms (Zapier, Make, CheapWorkflow). Right for connecting cloud apps without writing code. No-code workflow automation is built specifically for small teams who want straightforward automations at a predictable cost – no per-task pricing surprises, no enterprise complexity. If your workflow involves two or more cloud apps passing data between them, this is usually the fastest path.
2. Built-in automation in tools you already use. Many CRMs, email platforms, and project management tools have native automation features. HubSpot workflows, Notion automations, Gmail filters – check what you already have before adding a new subscription. If your existing tools can handle it, use them.
3. Scripting (Python, Google Apps Script). More flexible, harder to maintain, and requires someone who can own it long-term. If that person leaves, you have a black box. Only go this route if you have a team member who can genuinely own the code – not just someone who can copy-paste from Stack Overflow.
Decision guide: start with what you already have. If your existing tools can handle the workflow, use them. If not, choose a no-code platform that supports all the apps in your workflow. Add scripting only when the other options genuinely can’t do what you need.
The automation boundary. One of the most useful design decisions you’ll make is choosing which steps to automate and which to leave human. This isn’t a limitation – it’s a deliberate choice. Consider an invoice approval workflow: the automation collects the invoice, checks it against the purchase order, and flags any discrepancies. A human approves the payment. The automation does the legwork; the person makes the call. That split is often more reliable and more trusted than full automation, especially for financial or customer-facing steps. Decide where your boundary sits before you start building.
Step 5 – Build It
Start with the happy path. Build the automation for the normal case first. Get that working end-to-end before you add conditions and exception handling. A working simple automation is more valuable than a half-built complex one.
Map fields carefully. The most common build error is mapping the wrong field – data ends up in the wrong place in the destination app. A lead’s phone number lands in the “company name” field. An invoice amount populates the “notes” field. Check every field mapping explicitly, and verify the output in the destination app, not just the automation log.
Field mapping verification. After the first test run, open the destination record in the destination app and check every single field. Don’t trust the automation log – it can show “success” while the data is quietly wrong. Create a simple field mapping log and fill it in as you verify:
| Source field | Destination field | Expected value | Actual value | Match? |
|---|---|---|---|---|
| Form: First Name | CRM: Contact First Name | “Jane” | “Jane” | ✓ |
| Form: Email | CRM: Contact Email | “jane@example.com“ | “jane@example.com“ | ✓ |
| Form: Company | CRM: Company Name | “Acme Ltd” | “” | ✗ |
Silent mapping errors are the ones that cause the most damage. They don’t crash the automation – they just corrupt your data quietly, one record at a time.
Add conditions one at a time. Don’t build all your IF/THEN branches at once. Add one condition, test it, confirm it works, then add the next. This makes debugging straightforward – you always know which change broke something.
Document as you build. Write down what each step does, what app it connects to, and what field mappings you used. Future-you – or a teammate who inherits this – will need it. The automation itself doesn’t explain itself.
Step 6 – Test Before You Launch
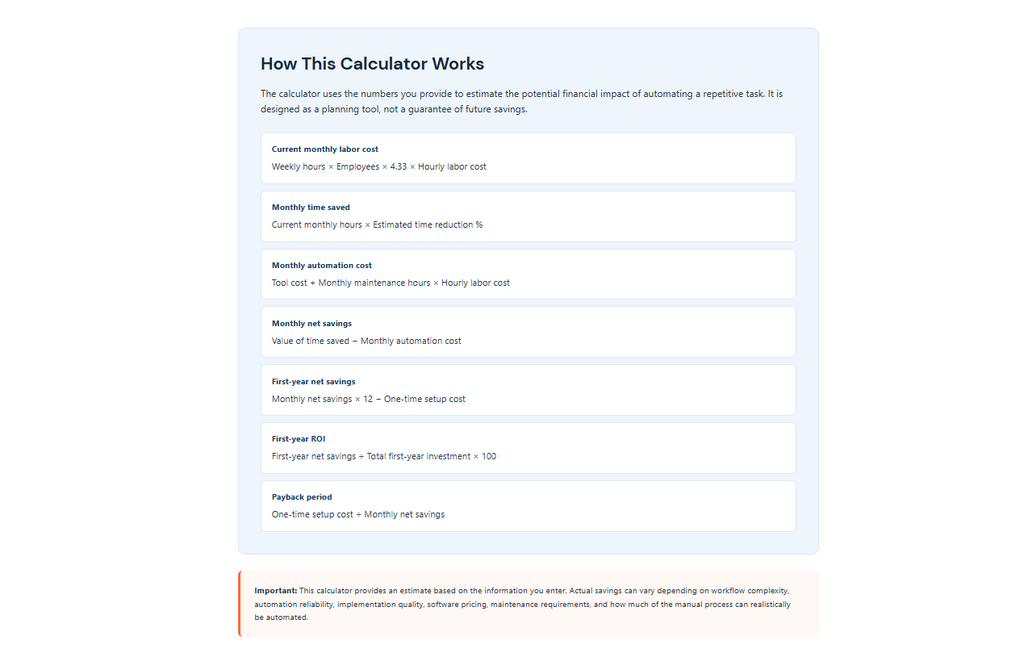
This is where most implementations cut corners. Don’t.
Test the happy path first. Does the normal case work end-to-end? Check the output at the destination app, not just the automation log. The log can show “success” while the CRM record has a field mapping error that silently corrupts your data.
Then test the edge cases. This is the part most people skip. Use realistic test cases, not real customer data – real customer data in a test environment creates privacy and data integrity problems you don’t need.
Edge Case Testing Table
Copy this table. Fill in “Actual result” and “Pass/Fail” as you run each test. Don’t skip rows.
| Test case | Input | Expected result | Actual result | Pass/Fail |
|---|---|---|---|---|
| Normal submission | All fields complete | CRM record created, email sent | – | – |
| Missing email field | Email blank | Automation stops, error logged | – | – |
| Duplicate submission | Same email twice | Second record flagged, not duplicated | – | – |
| Name with apostrophe | O’Brien | Name appears correctly in CRM | – | – |
| Email with plus sign | user+tag@email.com | Email delivered correctly | – | – |
| Very long company name | 200-character string | Field truncated or handled gracefully | – | – |
| Invalid phone format | “call me” in phone field | Field logged as invalid, not crashed | – | – |
| Integration timeout | Destination app slow to respond | Retry attempted, then error logged | – | – |
Eight test cases is a minimum, not a target. Add rows for anything specific to your workflow.
Use test mode if your platform has it. This runs the automation logic without executing the actions – useful for checking trigger conditions and field mappings before anything fires for real.
Define what a failed test looks like. Not just “it didn’t run” – also “it ran but produced wrong output.” A CRM record with blank fields is a failed test, even if the automation log says it completed successfully. That’s it. That’s the whole test.
Confirm graceful failures. Run at least one test that should fail – a record with a missing required field – and confirm the failure handling works as designed. If the automation crashes instead of logging an error, that’s a problem to fix before launch.
For more detail on building and testing specific task automations, the step-by-step guide to automating repetitive tasks covers the build and test phase in depth.
Step 7 – Launch and Monitor
Soft launch first. Run the automation alongside the manual process for the first week. Compare outputs. Catch discrepancies before the manual process is switched off. This is the single most effective thing you can do to prevent a bad automation from causing real damage.
Assign one owner. Not “the team” – one specific person. That person should know: what the automation does, what apps it connects, what triggers it, where failures appear, how to disable it, and what the manual fallback is. If that person is unavailable, who’s the backup? Write that down too.
Set up failure notifications before you go live. Most platforms support email or Slack alerts when a step fails. Enable them. An automation that fails silently for three days is worse than no automation at all – at least with a manual process, someone notices when the work isn’t getting done.
Document the manual fallback before launch, not after the first failure. If the automation stops, what does the team do? How do they identify which items were missed? How do they process them manually? Write this down. A team that hasn’t thought about the fallback will either do nothing or improvise – neither is good.
Launch timing matters. If the automation touches customer communication, launch when someone is available to monitor it. A Friday afternoon launch means a failure can sit unnoticed until Monday.
Monitoring Schedule
Workflow automation monitoring isn’t a one-time task. Here’s a practical schedule:
| Period | Log checks | Output review |
|---|---|---|
| Week 1 | Daily | Review all outputs manually |
| Weeks 2–4 | Every 2–3 days | Spot-check 20% of outputs |
| Month 2 onwards | Weekly | Monthly output audit |
Taper the intensity as confidence builds – but don’t drop to zero. A monthly audit catches drift before it becomes a problem.
Failure pattern recognition. Most automations that fail repeatedly do so for the same reason. After the first month, pull all failure logs and look for patterns: same step failing, same data type causing errors, same time of day. A pattern is a signal to fix the root cause, not just retry. Retrying a broken step 10 times doesn’t fix the underlying issue – it just delays the inevitable.
Step 8 – Measure Whether It Worked
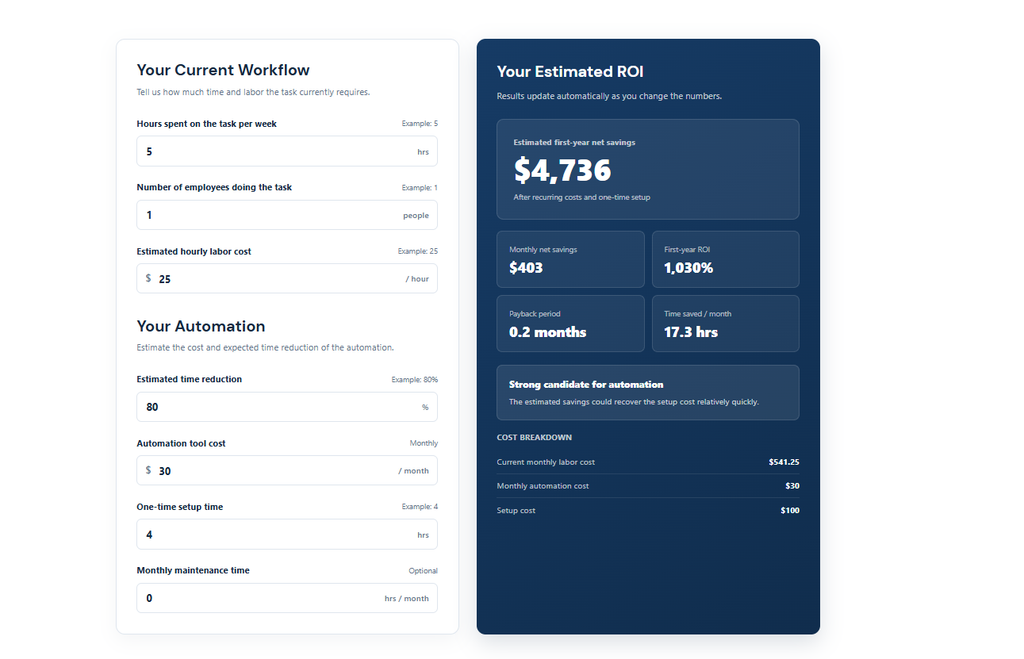
The question isn’t “is it running?” It’s “is it saving more time than it costs to maintain?”
Before/After Measurement Table
Record the Before numbers when you launch the automation. Then measure the same metrics again after 30 days and calculate the change.
| Metric | Before | After 30 Days | Change |
|---|---|---|---|
| Time per instance | Record | Measure | Calculate |
| Frequency per week | Record | Measure | Calculate |
| Error rate | Record | Measure | Calculate |
| Manual handoffs | Record | Measure | Calculate |
| Maintenance time per week | Record | Measure | Calculate |
| Net time saved per week | — | — | Time saved minus maintenance |
For example, if a task took 10 minutes before automation and now takes 2 minutes of human attention, you are saving roughly 8 minutes per instance. Multiply that by the number of times the workflow runs each week, then subtract the time spent maintaining it.
If net time saved is negative after 30 days, don’t automatically assume the automation failed. Look at the data first. You may have chosen a workflow that wasn’t frequent enough, or the workflow may be generating too many exceptions and requiring too much manual intervention.
Both problems can be fixed, but you need the measurements to know which one you’re dealing with.
This before-and-after framework is a practical part of good workflow automation implementation. It keeps the decision based on actual results rather than simply whether the automation is technically running.u honest about whether automation is actually helping, and it gives you the numbers to justify (or question) the next one.
Workflow Automation Implementation Checklist
Use this as your automation implementation plan. Work through it in order.
Phase 1 – Before You Build
- Chosen one workflow to start with
- Confirmed it meets all 5 readiness criteria
- Documented every step of the current manual process
- Identified and removed unnecessary steps
- Timed one complete manual run (baseline)
- Identified all variations and exceptions
- Defined the trigger (specific and unambiguous)
- Written IF/THEN rules for all branches
- Listed every action with app, action type, and fields
- Decided which exceptions to handle in the automation vs. route to manual review
- Chosen the automation approach (no-code platform / built-in tool / script)
Phase 2 – Build and Test
- Built the happy path first
- Verified field mappings in the destination app (not just the log)
- Added conditions one at a time, testing each
- Completed the edge case testing table (8+ test cases)
- Tested at least one graceful failure scenario
- Confirmed failure handling works as designed
Phase 3 – Launch
- Assigned one named owner
- Identified a backup owner
- Set up failure notifications (email or Slack)
- Documented the manual fallback process
- Launched alongside the manual process (soft launch)
- Compared outputs daily for the first week
- Switched off the manual process only after one clean week
Phase 4 – Monitor and Maintain
- Added automation to the inventory spreadsheet
- Recorded baseline metrics before launch
- Checked logs daily (week 1), every 2–3 days (weeks 2–4), weekly (month 2+)
- Completed the 30-day before/after measurement
- Reviewed failure logs for patterns after month 1
- Scheduled a quarterly review of all active automations
Scaling From One Automation to Several
Don’t build the next automation until the first one is stable and documented. “Stable” means it’s been running for at least a month with no unexpected failures and no manual interventions beyond what you planned for.
Keep an automation inventory. A simple spreadsheet with one row per automation: name, owner, what it does, what apps it connects, date created, date last checked. This takes five minutes to set up and saves hours of confusion when something breaks six months later.
Watch for interdependencies. When automation A triggers automation B, a failure in A can cascade. The lead form submission triggers a CRM entry (automation A), which triggers an onboarding email sequence (automation B). If A fails, B never fires – and nobody notices until a new customer complains they never heard from you. Map these dependencies before they become a debugging problem.
Avoid automation sprawl. More automations means more maintenance. Every new automation should have a clear owner and a documented fallback before it goes live. If you can’t answer “who owns this?” for every automation in your inventory, you have a sprawl problem.
For the broader picture of how automation fits into your business operations, the guide to workflow automation for small businesses covers the strategic side.
Common Implementation Mistakes
These aren’t hypothetical. They’re the patterns that come up repeatedly when automation rollout goes wrong.
1. Automating a process nobody has documented. The automation faithfully reproduces every inconsistency in the manual process. Different team members handle exceptions differently. The automation picks one approach and applies it to everything – including the cases where it’s wrong.
2. Skipping edge-case testing. The happy path works perfectly in testing. The first time a customer submits a form with an apostrophe in their name, or leaves a required field blank, or submits twice by accident – the automation breaks. And because nobody set up failure notifications, nobody knows.
3. No failure notifications. The automation fails silently. Tasks don’t get created. Emails don’t go out. Data doesn’t sync. The team assumes everything is working because the automation is “on.” Three days later, someone notices the backlog.
4. No manual fallback. When it breaks – and at some point, it will break – nobody knows what to do. The team either waits for the automation to be fixed or improvises, creating a mess that’s harder to clean up than if the automation had never existed.
5. Building too many automations at once. Interdependencies nobody fully understands. Thin test coverage on all of them. When something breaks, it’s not clear which automation caused it or how to fix it without breaking something else. The automation inventory becomes a liability instead of an asset.
6. Buying a new tool before mapping the workflow. Many small businesses sign up for an automation platform before they’ve documented what they’re trying to automate. The tool becomes the project instead of the workflow. You spend a week learning the platform, building something, and realising halfway through that the process you’re automating isn’t actually consistent enough to automate. Map first. Then choose the tool that fits what you’ve mapped.
FAQ
How do you implement workflow automation step by step?
Start by choosing one workflow that’s already consistent and runs frequently. Document every step of the current manual process before opening any tool – shadow the person who actually does it, not the person who wrote the procedure. Define the trigger, rules, and actions explicitly, including exception handling. Build the automation starting with the happy path, then add conditions one at a time. Test with at least eight cases including edge cases. Soft-launch alongside the manual process for one week. Assign one owner, set up failure notifications, and document the manual fallback. Measure results at 30 days before building the next automation.
What should a small business automate first?
The best first automation is one that runs frequently, follows the same steps every time, starts with a clear trigger, and has a low blast radius if it misfires. Good starting points: new lead → CRM entry, invoice sent when a job is marked complete, appointment reminder 24 hours before, new customer → onboarding email, support ticket → team notification. Score candidates by multiplying frequency per week by time per instance – that gives you your weekly time cost and your ROI ceiling.
How long does workflow automation implementation take?
It depends on the complexity of the workflow. A simple two-step connection (form submission → CRM entry) might take 30–60 minutes for someone who’s done it before. A multi-step workflow with conditional logic, exception handling, and multiple apps can take a full day or more. Your first automation will almost always take longer than you expect – both because of the learning curve with the tool and because understanding your own process well enough to automate it takes real time. The more useful question: how long does the task currently take every week? That’s the number that tells you whether the investment is worth it.
How do you test an automated workflow properly?
Test the happy path first, then deliberately try to break it. Submit a form with a missing required field. Create a duplicate record. Use a name with an apostrophe. Use an email address with a plus sign. Submit an unusually long input. Check the output at the destination app – not just the automation log, which can show “success” while the data is wrong. Run at least eight test cases before going live, and include at least one that should fail gracefully to confirm your exception handling works.
What happens when an automation fails?
If you’ve set up failure notifications, you’ll get an alert and can investigate immediately. Check the automation log to identify which step failed and why – most platforms show the exact error. Disable the automation if needed, process any missed items manually using your documented fallback, fix the issue, test the fix, then re-enable. If you haven’t set up failure notifications or documented a fallback, you’ll find out the automation failed when a customer or teammate notices something didn’t happen. That’s the scenario worth preventing.
Do I need technical skills to implement workflow automation?
No. No-code workflow automation platforms are designed for people without coding backgrounds. The skills you need are process thinking (can you describe the workflow clearly as a sequence of steps?) and attention to detail during setup and testing. The documentation and testing phases are more important than the build phase. If you can write a checklist, you can implement a basic automation. More complex workflows with conditional logic and multiple apps take more time to learn, but they don’t require code.
What should you automate first in a small business?
Automate the workflow that runs most frequently, follows the same steps every time, and has the lowest blast radius if it misfires. For most small businesses, that’s either new lead → CRM entry or invoice sent when a job is marked complete. To choose between candidates, multiply frequency per week by time per instance – that’s your weekly time cost and your ROI ceiling. The workflow with the highest number is where automation pays back fastest.
How do you prevent an automation from breaking?
Three things. First, set up failure notifications so you know immediately when something goes wrong – don’t wait for a customer to tell you. Second, assign one named owner who knows how to disable and restart the automation. Third, document the manual fallback so the team can keep working while the automation is being fixed. Beyond that: test edge cases thoroughly before launch, and review failure logs monthly for patterns. A recurring failure at the same step, with the same data type, at the same time of day – that’s a root cause waiting to be fixed.